EASY CRAFTS FOR KIDS: PAPER PINWHEEL
Ready for another creative project? Today’s blog post is all about how to decorate and make your own pinwheels! Gather your art supplies and let’s begin!
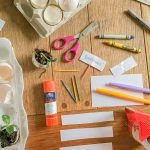
Supplies:
Paper
Scissors
Thumb Tacks
No. 2 Pencils
Crayons, markers, paints, or pencils

1. Start with a piece of paper and cut it into a square. We recommend making your square at least 4-inches x 4-inches and no larger than 8-inches x 8-inches.
Note: The piece of paper in this photo is 6-inches x 6-inches.

2. Let your creativity take you away and decorate both sides of your paper!


3. Starting at each corner, make a diagonal cut towards the center of your piece of paper.
Note: Do not cut all the way to the center. Stop about a half-inch away from it.


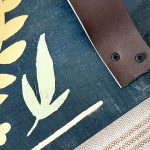
4. Gently place every other tip of the pinwheel on the thumbtack. Then, poke the thumbtack through the center of the piece of paper and secure it on the pencil eraser as shown.


5. Your pinwheel should look like the ones below—but with your own artistic touch!